
與 Woo 2.6 一起推出的新運輸區管理讓我們有機會默認添加統一費率,免費送貨和本地接送方式。
但是,如果客戶根據訂單金額(分層運送)需要 3 種不同的費率呢?例如:“訂單高達 $ 100,運費= $ 5; 訂單高達 $ 250,運費= $ 2; 訂單高於 $ 500,運費=免費 “。
這是否可以不使用插件?那麼答案,像往常一樣是絕對的!
分層運輸 – 運輸區域設置
轉到 WooCommerce> 設置> 運送並創建您的運送區域。在這個例子中,我將針對美國客戶,並添加 3 種運輸方式:統一費率,統一費率和免費送貨。
 運輸區設置分層運輸
2. 分層運輸 – 運輸方式設置
打開以前添加到該區域的每個運送方法,並重命名/設置它們,如下所示:
- 統一費率#1> 重命名為 “低於 $ 100” 的訂單,並分配成本= $ 5
- 統一費率#2> 重命名為 “低於 $ 250” 的訂單,並分配成本= $ 2
- 免費送貨> 選擇 “需要最低訂單金額”= $ 500
這是一種方法的設置:
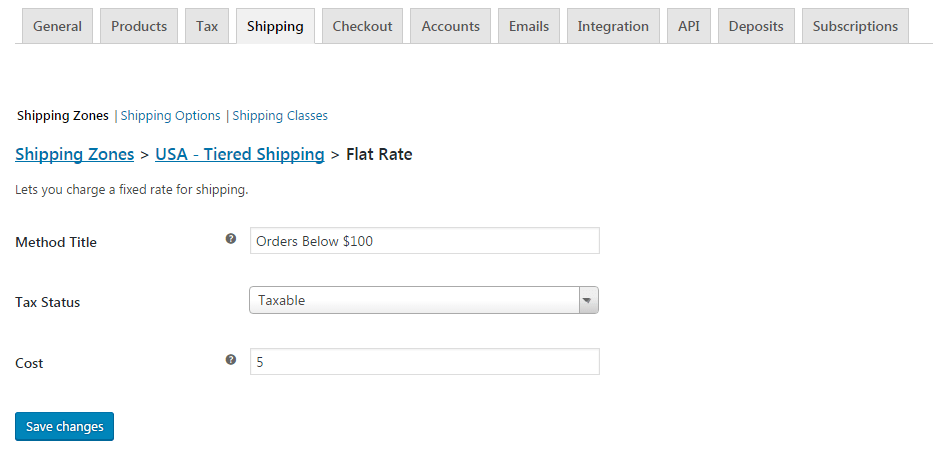 分層運輸的運輸方式設置
3. 分層運輸 – PHP 代碼段
現在我們需要 “告訴”WooCommerce,根據訂單金額,應該使用固定費率而不是另一個。只有這樣,我們才能向最終用戶顯示正確的運送方式。
First, take a note of the unique ID of the two flat rates. They should look look something like “flat_rate:9“. For more info on how to find it, check here: https://businessbloomer.com/woocommerce-disable-free-shipping-if-cart-has-shipping-class/#woocommerce-how-to-find-shipping-method-id-woo-2-6-after-the-introduction-of-the-new-shipping-zones
Second, let’s code! We’ll need to “unset” flat rate #2 if we are under $100, otherwise we’ll require to “unset” flat rate #1.
/**
* @snippet Tiered Shipping Rates | WooCommerce

* @sourcecode https://businessbloomer.com/?p=21425
* @author Rodolfo Melogli
* @testedwith WooCommerce 2.6.8, WordPress 4.7
*/

add_filter( 'woocommerce_package_rates', 'bbloomer_woocommerce_tiered_shipping', 10, 2 );

function bbloomer_woocommerce_tiered_shipping( $rates, $package ) {

  $threshold = 100;

  	if ( WC()->cart->subtotal < $threshold ) {

   		if ( isset( $rates['flat_rate:1'] ) ) unset( $rates['flat_rate:2'] );

	} else {

		if ( isset( $rates['flat_rate:2'] ) ) unset( $rates['flat_rate:1'] );

	}

  return $rates;

}
如何添加此代碼?
您可以將 PHP 代碼片段放置在主題或子主題的 functions.php 文件的底部(如果是 CSS 代碼,請添加到主題的 style.css 文件底部),修改之前建議先備份原始文件,若出現錯誤請先刪除此代碼。
此代碼是否可用?
或是您有更好的解決方案想要分享?請到薇曉朵 WooCommerce 中文論壇 留言告知,我們希望可以幫到更多國內的 WooCommerce 用戶也希望您的參與。
